
Best ChatGPT Prompts for 3D Image
AskSide
July 30, 2026
Mastering the best ChatGPT prompts for 3D image creation is the key to producing digital art that possesses real depth and physical presence. These instructions go beyond simple keywords by defining the lighting, materials, and spatial relationships required for a volumetric look. By focusing on how light interacts with surfaces, you can guide the AI to render scenes that look like they could be touched or explored in a virtual space.
The gap between a flat 2D illustration and a convincing 3D render lies in the technical descriptors used during the prompting process. This guide provides a detailed breakdown of instructions designed to help you generate high quality three dimensional visuals for any creative project.
These are the Best ChatGPT Prompts for 3D Image
To achieve professional results in volumetric rendering, you must understand how to communicate spatial concepts to a language model. The best ChatGPT prompts for 3D image generation for 2025 focus on lighting physics, material properties, and specific camera lenses to simulate a real world environment. Below are the most effective ways to structure your requests to ensure your images have the depth and detail required for modern digital standards.
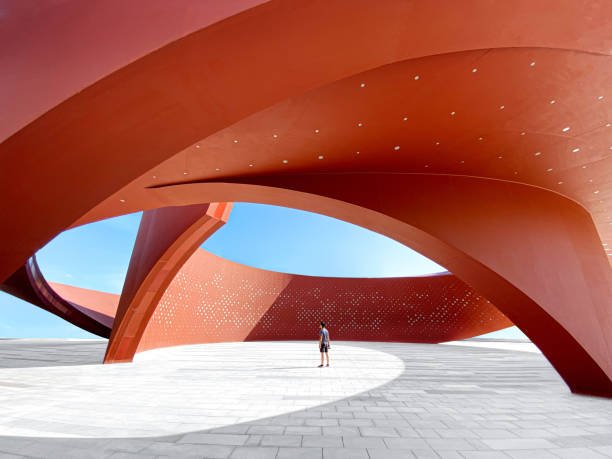
1. Architectural Visualization with Ray Tracing
Architectural renders require a high degree of precision regarding how light enters a room and bounces off various surfaces. This ChatGPT prompt for 3D image creation uses terms like ray tracing and ambient occlusion to tell the model how to handle shadows in corners and around furniture. By specifying the time of day, you can control the color temperature of the light, which drastically changes the mood of the room. This approach is perfect for interior designers or real estate professionals who need a realistic preview of a space before construction begins. The resulting image should feel spacious and physically accurate.
Create a high resolution 3D render of a modern minimalist living room during the golden hour. Use ray tracing to simulate realistic sunlight streaming through floor-to-ceiling windows, creating long, soft shadows. Focus on the textures of a velvet sofa, a polished concrete floor, and oak wood wall panels. Ensure ambient occlusion is visible in the corners and under the furniture to provide a sense of grounded volume. The camera should be at a wide angle to capture the entire spatial layout.
2. Character Design with Subsurface Scattering
One of the hardest things to replicate in 3D art is the way light penetrates skin, which is a phenomenon known as subsurface scattering. This prompt is designed for character artists who want their models to look organic rather than like plastic. It instructs the AI to treat the character's skin as a semi-translucent material that glows slightly when backlit. This technique is commonly used in high-end animation studios like Pixar or DreamWorks to give characters a lifelike, warm appearance. By using this best prompt for ChatGPT for 3D image development, you can create characters that feel vibrant and emotional.
Generate a 3D character design of a friendly forest elf with a focus on subsurface scattering in the skin textures. The lighting should be a soft rim light from behind to highlight the translucent edges of the ears. Use a 3D claymation style with smooth surfaces and large, expressive eyes. The character should be wearing a tunic with visible linen weave textures. The final output should look like a high-end 3D animated film still with a shallow depth of field.
3. Isometric Room Dioramas for Game Assets
Isometric views are a staple in the gaming industry, providing a unique perspective that allows players to see multiple sides of an object or room at once. This prompt focuses on orthographic projection, which removes perspective distortion to create a perfectly balanced 3D box. It is highly effective for creating icons, level mockups, or decorative digital assets. By asking for a "cutaway" view, you allow the viewer to see the internal details of the room as if it were a physical toy or a miniature model. This style is incredibly popular in mobile gaming and UI design.
Produce an isometric 3D cutaway of a cozy wizard's library. The room should be shaped like a perfect cube with the front two walls removed. Include 3D models of overflowing bookshelves, a bubbling cauldron with translucent green liquid, and a glowing crystal ball. Use a vibrant color palette with high contrast between the glowing magical elements and the dark wooden floor. The image should be rendered in a clean, high-poly style with sharp edges and no perspective distortion.
4. Product Mockups with Studio Lighting
Product designers often use AI to brainstorm packaging and physical form factors before moving into CAD software. This prompt simulates a professional photography studio, using softboxes and reflectors to highlight the contours of a product. It emphasizes material finishes like brushed metal, matte plastic, or glossy glass to help the viewer understand the physical quality of the item. Using the latest ChatGPT prompts for 3D image generation in this category ensures that the product looks premium and ready for a marketing campaign. The focus is on clarity, symmetry, and realistic reflections.
Design a 3D product mockup of a high-end wireless headphone set. The headphones should be made of brushed titanium with leather ear cups. Use studio lighting with a two-point light setup to create elegant highlights along the metallic edges. Place the product on a reflective black glass surface to create a subtle mirror effect. The background should be a dark, neutral gradient. The image should look like a professional 3D commercial render for a luxury tech brand.
5. Sci-Fi Hard Surface Modeling
Hard surface modeling refers to the creation of man-made objects like machinery, vehicles, and robots. This prompt utilizes terms like chamfered edges and greebles to describe the complex mechanical details found on sci-fi equipment. It encourages the AI to think about how different plates of metal fit together, creating a sense of functional engineering. This is a great way to generate concept art for spaceships or futuristic gadgets. The result is a dense, detailed image that suggests a high level of technological complexity and physical weight.
Create a 3D render of a futuristic sci-fi starship engine. Focus on hard surface modeling with chamfered edges and intricate mechanical greebles across the hull. The materials should be a mix of weathered steel and heat-tinted chrome. Use volumetric lighting to simulate blue energy glowing from the exhaust vents. The image should be a close-up shot, emphasizing the scale and the complex layering of the mechanical parts. The final render should have a gritty, cinematic feel.
6. Organic Biomorphic Shapes and Fluidity
Nature rarely works in straight lines, so 3D images of organic subjects need to focus on curves, fluid movements, and irregular patterns. This prompt asks the model to generate shapes that look like they have grown rather than been built. It is useful for environmental concept art or abstract 3D backgrounds. By mentioning "procedural textures," you guide the AI to create complex patterns like those found on shells, coral, or fungal growth. This creates a visually stimulating image that feels alive and constantly evolving.
Generate an abstract 3D image of biomorphic, organic shapes that resemble deep-sea coral and exotic fungi. The forms should be flowing and intertwined, with no sharp corners. Use a palette of iridescent colors that shift as they catch the light. The textures should be a mix of porous surfaces and slimy, wet coatings. Use a macro lens perspective to make the small details feel massive and immersive. The lighting should be bioluminescent, coming from within the organic structures.
7. Voxel Art for Retro Gaming Aesthetics
Voxel art is essentially the 3D version of pixel art, where every object is made of small cubes. This prompt is perfect for creators who want to tap into the nostalgia of early 3D gaming or the modern popularity of "block-based" worlds. It requires the AI to maintain a strict cubic grid, which results in a charming, toy-like appearance. This style is excellent for creating profile pictures, game icons, or social media content that stands out due to its unique geometric constraints. It emphasizes a simplified but highly readable visual language.
Create a 3D voxel art scene of a tiny island with a single palm tree and a treasure chest. Every element should be constructed out of small, uniform cubes on a visible grid. Use a bright, saturated color palette with flat lighting to emphasize the blocky shapes. The water surrounding the island should be translucent blue cubes. The final image should look like a high-quality render from a modern voxel-based game engine.
8. Low Poly Mesh for Performance-Driven Art
Low poly art uses a limited number of polygons to create an image, resulting in a stylized, faceted look. This prompt focuses on the beauty of the geometry itself, allowing the viewer to see the "wireframe" logic of the 3D model. It is a popular aesthetic in indie games and modern digital illustrations because it feels both retro and sophisticated. By specifying that the faces of the polygons should be flat and distinct, you ensure that the image has that signature "folded paper" or "carved wood" appearance. This is one of the best ChatGPT prompts for 3D image styles for a clean, minimalist portfolio.
Produce a 3D low poly landscape of a mountain range at sunrise. The mountains should be made of large, flat triangular faces with sharp edges. Use a gradient of warm oranges and cool purples across the facets of the rock to simulate the rising sun. The trees should be simple conical shapes. The final render should be clean, with no smoothing applied to the polygons, creating a beautiful geometric mosaic effect.
9. Glass and Refractive Materials
Rendering glass is a significant challenge for AI because it requires calculating how light bends as it passes through a medium. This prompt uses the concept of refraction indices and caustics to describe the complex patterns of light that appear on a surface after passing through a glass object. This is ideal for luxury branding or artistic experiments with light. The resulting image will have a level of realism that makes the digital object appear to have actual mass and optical properties. It is a sophisticated way to demonstrate the power of 3D rendering.
Generate a 3D image of a set of various glass prisms and spheres sitting on a white table. Focus on the refraction of light as it passes through the glass, creating colorful caustics and distorted patterns on the table's surface. The glass should be perfectly clear with subtle reflections of a studio environment. Use a high-quality global illumination model to ensure the light behavior is physically accurate. The shot should be a close-up with a sharp focus on the largest prism.
10. Macro 3D Photography of Microscopic Textures
Macro photography in the 3D world allows us to see details that are usually invisible to the naked eye. This prompt focuses on "micro-displacements," which are the tiny bumps and ridges on a surface that give it a realistic feel. By asking for a macro perspective on something like a butterfly wing or a piece of rusted metal, you can create stunningly detailed textures. This is perfect for background wallpapers or educational visuals. The key is to emphasize the "tactile" nature of the surface, making the viewer feel like they can sense the roughness or smoothness of the material.
Create a 3D macro render of a single drop of water sitting on a highly detailed leaf. The focus should be so close that the individual cells of the leaf and the veins are clearly visible as a 3D displacement map. The water drop should act as a magnifying glass, showing a distorted view of the leaf's texture beneath it. Use a very shallow depth of field to make the water drop pop against a blurred background. The lighting should be bright morning sun, creating a sparkling highlight on the liquid.
11. Abstract Geometric Volume and Form
Sometimes the goal is not to represent a real object but to explore pure form and volume. This prompt uses geometric primitives like spheres, cubes, and toroids to create a balanced 3D composition. It focuses on how these shapes intersect and cast shadows on one another, creating a sense of three-dimensional space without a specific subject. This is excellent for modern art pieces or website hero images. The prompt emphasizes "sculptural" qualities, treating the digital space like a gallery where the interaction of shapes is the primary focus.
Design an abstract 3D composition featuring floating geometric shapes like matte spheres, metallic rings, and translucent cubes. The shapes should be arranged in a dynamic, gravity-defying cluster. Use a soft, multi-directional light source to create a range of subtle shadows and highlights that define the volume of each object. The color palette should be monochrome with different textures—rough, smooth, and etched—to provide visual variety. The final image should look like a contemporary 3D sculpture.
12. Unreal Engine 5 Style Real-Time Rendering
Unreal Engine 5 has set a new standard for real-time graphics with its Lumen and Nanite technologies. This prompt asks the AI to mimic that specific "next-gen" gaming look, which is characterized by incredible detail and dynamic global illumination. It is perfect for concept art for video games or cinematic trailers. By mentioning "high-poly count" and "dynamic lighting," you encourage the model to provide an image that looks like it could be part of a modern AAA game title. The focus is on a high level of environmental detail and atmospheric effects like fog or dust motes.
Generate a 3D cinematic render of an ancient temple overgrown with jungle vines, styled after an Unreal Engine 5 tech demo. Use Nanite-level detail on the stone carvings and Lumen-style dynamic global illumination to light the scene. Include volumetric fog and dust motes dancing in the light beams. The textures should be 8k resolution, showing every crack and mossy patch on the stones. The final output should look like a frame from a high-budget video game trailer.
13. Dioramas and Miniature Scale Models
Dioramas are self-contained worlds that offer a charming, miniature perspective on a scene. This prompt uses "tilt-shift" photography techniques to make a full-sized scene look like a tiny model. It is a creative way to present environments, such as a busy city street or a quiet farm, in a 3D format. By emphasizing the "plastic" or "painted" look of the elements, you lean into the miniature aesthetic. This is an engaging way to tell a story or showcase an environment in a compact, visually dense 1x1 or square format.
Create a 3D diorama of a bustling medieval marketplace. The entire scene should look like a miniature model made of painted resin and plastic. Use a tilt-shift effect to make the people and stalls look like tiny figurines. The lighting should be bright and cheerful, as if the model were on display in a well-lit museum. Ensure every small detail, from the tiny fruits on the stalls to the cobblestones on the ground, is clearly sculpted and rendered with a high-gloss finish.
14. 3D Icons and UI Elements
In modern web design, 3D icons have replaced flat icons to provide a more tactile and interactive feel. This prompt focuses on "claymorphism" or "glassmorphism," which are popular styles for buttons and menus. It ensures that the icons have a consistent lighting direction and a "soft" feel that makes them look clickable. Using a ChatGPT prompt for 3D image creation for UI design helps you maintain a consistent look across an entire application or website. The focus is on simplicity, soft shadows, and rounded edges.
Design a set of 3D icons for a finance app, including a gold coin, a piggy bank, and a credit card. The icons should have a soft 'claymorphism' style with rounded edges and matte finishes. Use a uniform top-down light source to create consistent soft shadows beneath each object. The colors should be vibrant but professional. Ensure each icon has a clear 3D volume and looks like a physical object that can be touched. Render them on a transparent background for easy integration.
15. Anatomical and Medical 3D Visuals
Medical illustrations require a balance between scientific accuracy and visual clarity. This prompt asks for a 3D cross-section of a biological structure, using different materials to represent bone, muscle, and tissue. It is a vital tool for educators and health professionals who need to explain complex internal systems. By specifying "clear, labeled-style lighting," you ensure that the important parts of the anatomy are highlighted. The result is a professional educational visual that looks like it was pulled from a modern medical textbook or a high-tech surgical simulation.
Generate a 3D anatomical render of a human heart cross-section. Use different textures and colors to distinguish between the muscular walls, the valves, and the arteries. The image should be clean and clinical, with bright, even lighting that avoids deep shadows. Focus on the 3D volume of the internal chambers, showing the complexity of the organ's structure. The final render should be high-resolution and suitable for an educational medical presentation, with a neutral white background.
Things to Consider When Creating a ChatGPT Prompt for a 3D Image
Producing a high-quality 3D image is not just about the subject matter; it is about the technical parameters that govern how that subject is rendered. To move beyond 2D-looking results, you need to incorporate specific instructions that address the physics of a 3D environment. Here are several factors to consider when refining your prompts to achieve a truly volumetric look.
1. Lighting is the Key to Volume: Shadows are what tell the human brain that an object has three dimensions. If the lighting is too flat, even the most detailed 3D model will look like a 2D drawing. In professional 3D rendering, artists use techniques like "three-point lighting" or "HDRI environments" to ensure that light hits the subject from multiple angles, creating the highlights and shadows necessary for depth. Always include a description of where the light is coming from and what kind of shadows it should produce in your ChatGPT prompt for 3D image requests.
2. Material Physics and PBR Textures: Physically Based Rendering (PBR) is a method of shading and rendering that provides a more accurate representation of how light interacts with surfaces. When writing a prompt, don't just say "metal" or "plastic." Instead, describe the "roughness," "metallicness," and "reflectivity" of the surface. For example, "brushed aluminum with 0.3 roughness" tells the AI exactly how much blur to apply to the reflections. This level of detail is what separates a generic image from a professional-grade 3D render.
3. Camera Lens and Perspective: The "virtual camera" used to capture your 3D scene significantly affects the spatial feeling of the image. A "wide-angle lens" (like 16mm or 24mm) will exaggerate the distance between objects, making a room feel larger. A "telephoto lens" (like 85mm or 100mm) will compress the space, which is often used in portraiture to make the subject stand out. Specifying a "shallow depth of field" or "bokeh" is another way to force the AI to focus on a 3D object while blurring the background, emphasizing its volume.
4. Geometry and Polygon Density: While AI doesn't work with actual polygons like a 3D software program, it understands the visual language of geometry. Using terms like "high-poly count," "subdivision surface," or "sharp bevels" helps the model understand that you want a smooth, high-detail finish. For a more stylized look, you might request "low poly" or "faceted" surfaces. Mentioning the "wireframe" can also create an interesting "work-in-progress" look that is very popular in tech-focused designs.
5. Global Illumination and Indirect Light: In the real world, light doesn't just hit an object and stop; it bounces off surfaces and lights up other areas. This is called global illumination. Including this in your best prompt for ChatGPT for 3D image generation ensures that the colors from your floor "bleed" onto your walls or that the underside of a table is subtly lit by the floor's reflection. This indirect lighting is a subtle but powerful cue that tells the viewer they are looking at a realistic 3D space rather than a flat image.
6. Post-Processing Effects: Real 3D renders often go through a post-processing stage to add film grain, lens flares, or chromatic aberration. These tiny imperfections make a digital image feel more like a photograph taken with a real camera. Asking for "subtle film grain" or "slight lens distortion" can help remove the "too-perfect" look that some AI models produce by default. This adds a layer of believability and cinematic quality to your final 3D visual, making it feel more grounded in reality.
Conclusion
Mastering the best ChatGPT prompts for 3D image generation is a continuous process of learning how to translate spatial concepts into descriptive text. By focusing on the physics of light, the properties of materials, and the mechanics of virtual cameras, you can guide the AI to create visuals with incredible depth and realism. Whether you are designing characters, architectural spaces, or abstract art, the specificity of your instructions determines the quality of the final render. As AI models continue to evolve, the ability to communicate technical 3D concepts will remain a vital skill for digital artists and designers looking to push the boundaries of what is possible in the three-dimensional space.
Enjoyed this read?
Share it with your friends and colleagues.